
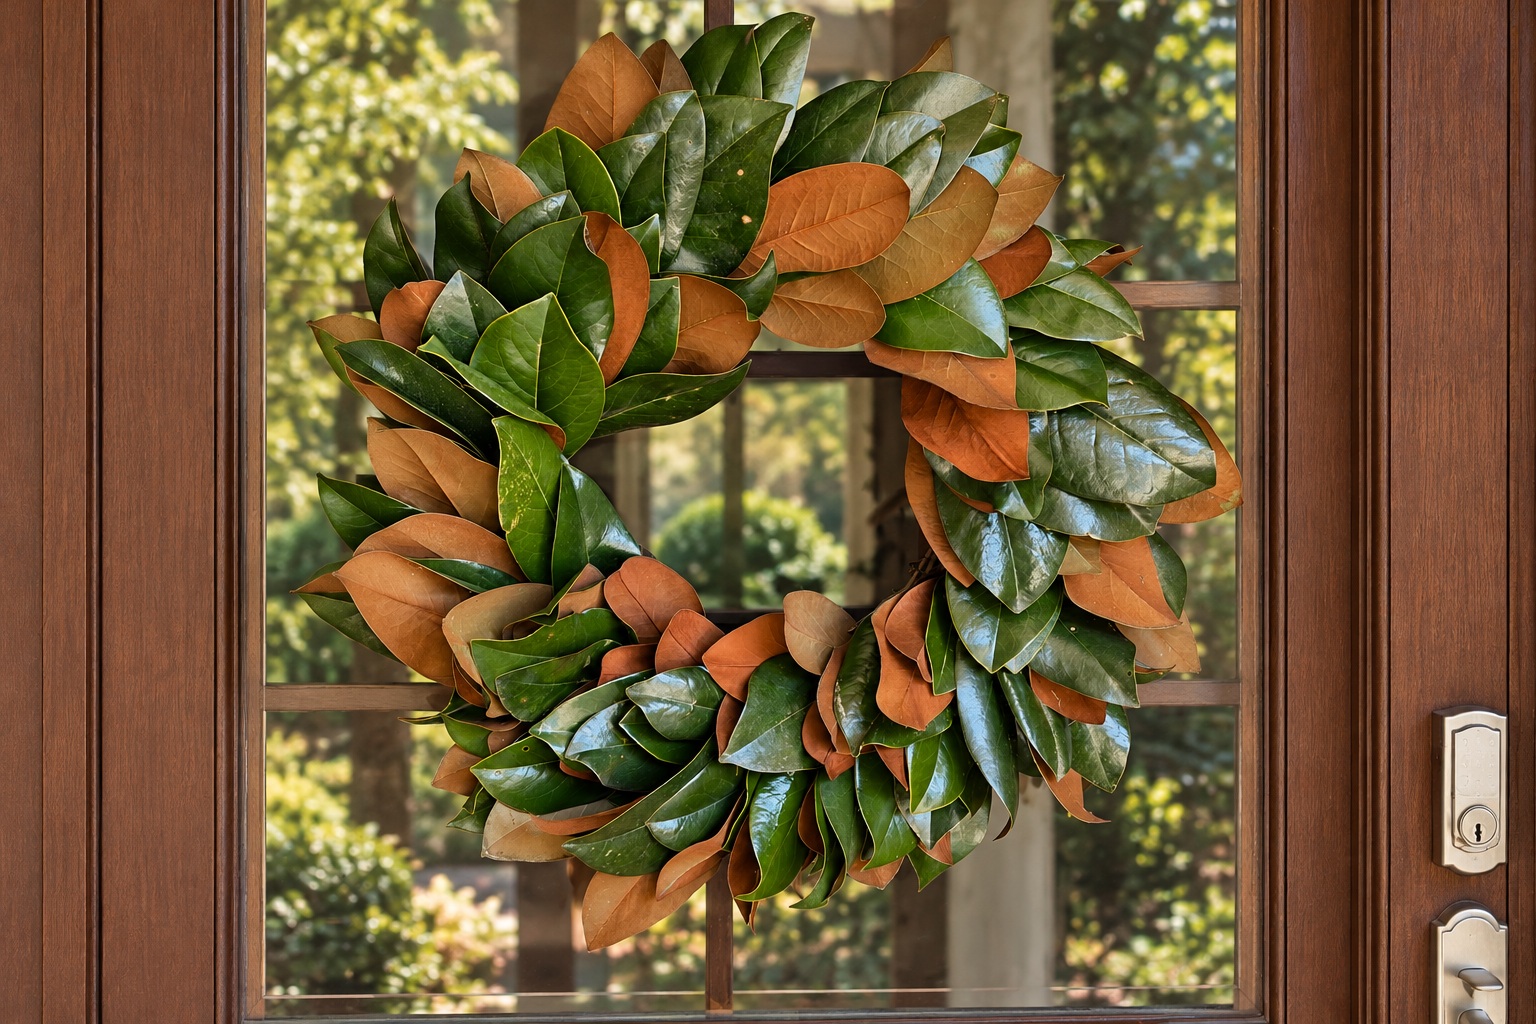
Homemade Fresh Magnolia Wreath
By: Southern Hospitality Company
If you have admired a magnolia wreath and assumed making one required some special floral talent, let me reassure you: you are making little bunches of leaves, wiring them together, and repeating yourself around a circle. Once you have attached the first few bunches, you have learned the process.
I clipped a few low hanging magnolia limbs from my yard, gathered some wire and a wreath base, and got to work. Booker, my golden retriever, joined me for quality control. She was particularly interested in the sticks.
What came out of that little afternoon project now hangs on my front door, and it makes me happy every single time I see it.
That is a pretty good return on a pile of yard clippings.

What You Will Need
- Fresh magnolia clippings with enough stem to wrap with wire
- A wreath base, like the grapevine wreath I used
- Floral wire on a paddle or spool
- Garden clippers and wire cutters
- A cloth for cleaning the leaves
- Ribbon, if you would like a bow
- Optional wired floral picks to help anchor short stems
The amount of greenery depends on the size of your base and how full you want your wreath. Start with a generous pile and keep a few extra leaves nearby for filling gaps.
No magnolia tree? Ask a friend who has one, or check with a local florist for fresh greenery. You do not need an entire branch of the family to own acreage for this project.
1. Gather and Clean Your Leaves
Look for healthy leaves in a mix of sizes. Clip small sections with usable stems, then rinse away dirt and gently wipe any remaining spots. Let the leaves dry before you begin assembling.
Magnolia does much of the decorating for you. The glossy green fronts and velvety copper backs are beautiful together, so keep both in mind as you sort your clippings.
I wanted a fresh wreath to enjoy until it was time for my Christmas wreath to take its place. I skipped preservation and went straight to making it.
Do You Need to Preserve the Leaves?
You can use vegetable glycerin if you want to preserve magnolia foliage, but this is an optional project of its own.
Glycerin helps the leaves stay flexible as their color changes toward golden or burnished brown. It will not keep them looking freshly picked and green forever. University of Florida Extension describes placing cut stems in one part glycerin to two parts water, with treatment typically taking two to three weeks or longer. Individual leaves can also be treated using a separate soaking method.
For a simple seasonal wreath like mine, you can skip this step entirely. If you do preserve your foliage, Mississippi State Extension recommends displaying the finished wreath indoors, away from humid conditions.


2. Make Small Bunches
Gather four or five leaves, bringing their stems together at the bottom. Fan them slightly so you can see each leaf rather than stacking them into one flat pile.
Turn some green sides forward and some copper backs forward. Vary their heights a little, too. That mix gives the wreath its color, texture, and fullness.
Wrap floral wire around the stems several times until the bunch holds together securely. Keep the wire around the stems rather than across the broad faces of the leaves.
Then make another bunch. And another.
There is no perfect green to brown ratio to achieve. If you like how the bunch looks in your hand, it is ready.
3. Attach Your First Bunch
Secure the end of your spool of floral wire to the wreath base.
Lay your first bunch against the base with the leaves pointing along the curve of the wreath. Wrap the wire around both the stems and the base a few times, pulling firmly enough to keep the bunch from shifting.
Keep the spool attached as you work. That saves you from cutting and restarting the wire with every addition.
If a short stem needs extra support, a wired floral pick can help anchor it in the grapevine base.
4. Overlap and Repeat
Place the next bunch so its leaves cover the stems and wire of the previous one. Wrap it securely to the base, then repeat around the wreath, keeping the leaves flowing in the same general direction.
The overlap is the whole trick. Each new bunch hides the working parts of the one before it.
Angle some bunches slightly toward the outside edge and others toward the center to give the wreath fullness across the base. Keep the center opening clear, and pause occasionally to look at the whole thing.
If one section looks thin, add another bunch. If a leaf is sticking out at an odd angle, adjust it. The wire gives you room to change your mind.
Booker remained available for consultation throughout this stage. Her enthusiasm exceeded her wiring skills.
5. Close the Circle and Fill the Gaps
When you reach your starting point, gently lift the leaves of the first bunch and tuck the stems of your final bunch beneath them. Secure with wire so the join disappears under the foliage.
Cut the wire, fasten the end securely to the back of the base, and tuck any sharp ends inward.
Now hang the wreath temporarily and take a step back. You will spot gaps much more easily upright than flat on the table.
Add a few leaves wherever the base shows through, securing their stems with wire or a floral pick. Give everything a gentle check to make sure it stays put.
A bow is entirely up to you. I love that magnolia has enough personality to hold its own.


Keeping Your Wreath Looking Its Best
Fresh magnolia will gradually dry, and its appearance will change. How quickly that happens depends on the weather and where you hang it, so think of this as seasonal greenery rather than a promise of a certain number of weeks.
A cool, shaded, sheltered spot will help it last longer. Avoid strong direct sun and heat sources. Light misting with plain water can help fresh wreaths retain their appearance, although the leaves will still dry and become more fragile over time.
As individual leaves begin to look tired, you can tuck in fresh replacements. When you are ready to change wreaths, remove the greenery and save your base for the next project.

A Gift for the Person You Never Know What to Buy
Making this has me thinking about Thanksgiving hostess gifts and Christmas gifts for those people who are impossible to shop for.
A handmade magnolia wreath, finished with a beautiful ribbon, feels thoughtful and personal. It is something they can enjoy the moment they hang it up, without having to find room for another serving dish.
For gifts, I would make fresh wreaths close to the day I planned to give them and include a little note about hanging them in a sheltered spot and enjoying them as they naturally dry.
Also, there is considerable satisfaction in answering “Where did you get that?” with “I made it.”
I highly recommend giving yourself that opportunity.
Love the Look but Short on Time?
I have included a few faux magnolia wreaths below for anyone who loves the look and would prefer theirs to arrive in a box. A beautiful front door is a beautiful front door.
But if you are even a little tempted to try making one, gather your supplies and start with a single bunch of leaves.
You do not have to know how to make the whole wreath before you begin. Make one bunch, attach it, and make the next. Somewhere along the way, you will realize you are doing the very thing you thought you did not know how to do.
And then you get to smile at it every time you come home.


We’d love to hear your thoughts if you try this project!
Tag us @SouthernHospitalityCo if you make them!
Share this post:
Click this link to visit our shop! Follow us on social media below!
Southern Hospitality Company