
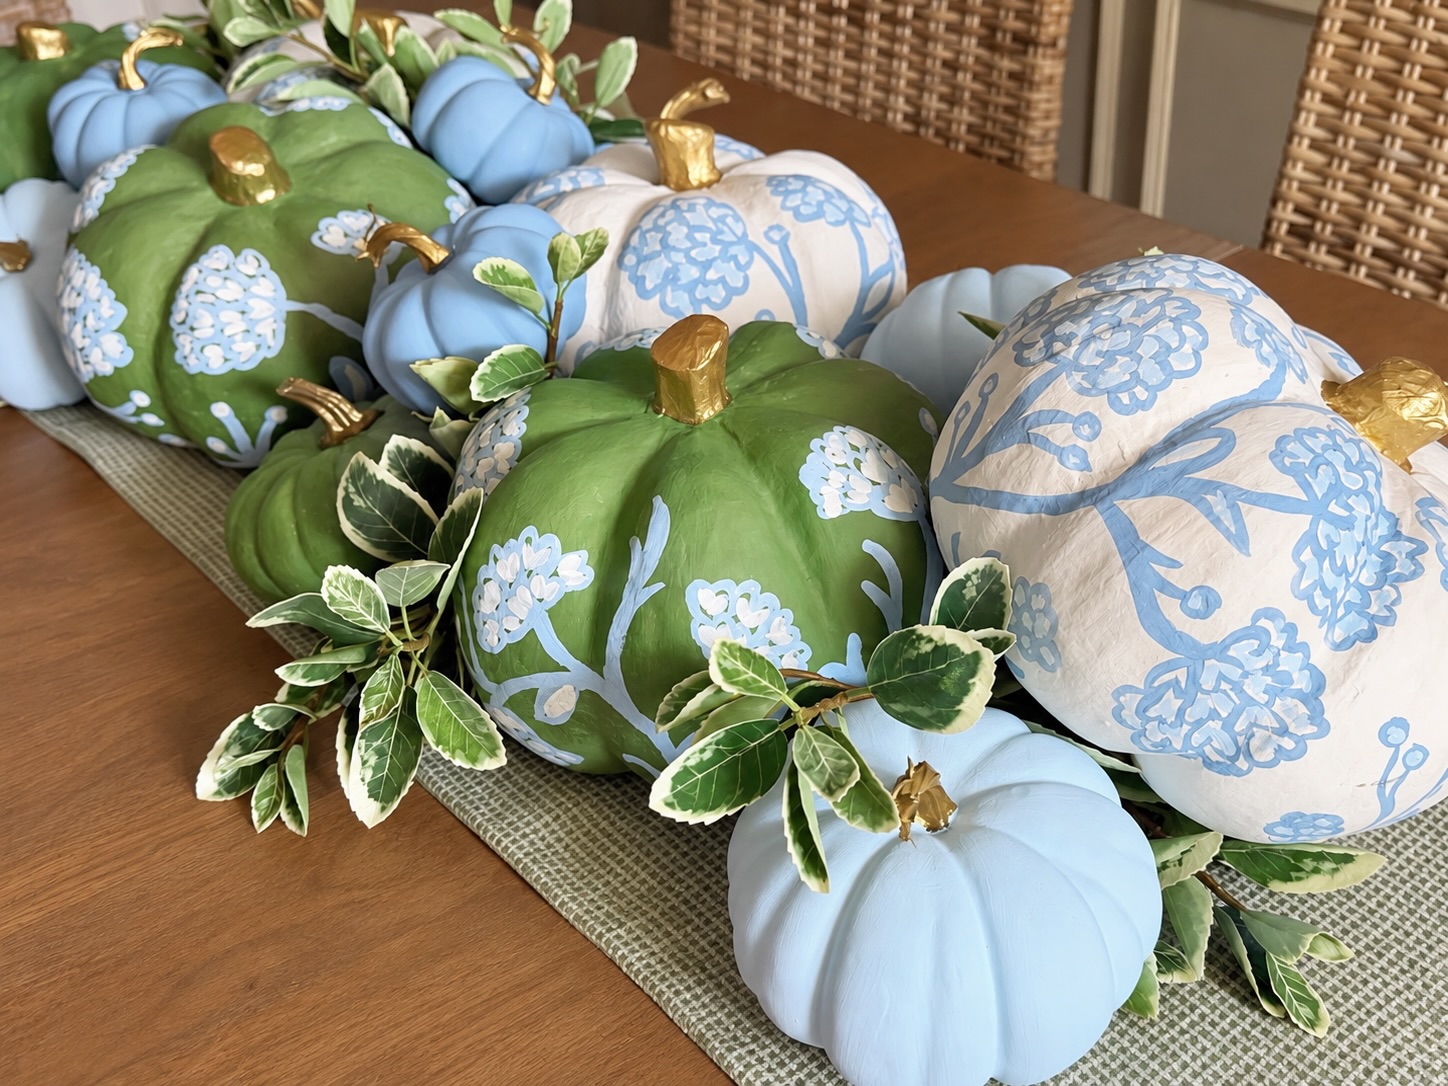
DIY Hydrangea Painted Pumpkins for Fall
By: Southern Hospitality Company
I love fall, but I’ve never been someone who wants to completely change the colors in my house just because the calendar says September. My house is already full of blues, greens, whites and natural textures, and bringing in a lot of orange, yellow and rust just doesn’t feel like me.
So instead, I decided to make my fall decor work with what I already have.
And when I say make, I mean quite literally.

I found these papier-mâché pumpkins at Hobby Lobby while their fall decor was 50% off. They run sales on their seasonal pieces all the time this time of year, so this ended up being a very inexpensive little project.
I grabbed several of the larger papier-mâché pumpkins to paint, plus a handful of smaller pumpkins in different shapes and sizes. The smaller ones got simple solid coats of blue and green, while the larger ones became my slightly more ambitious blue-and-white and green-and-blue floral pumpkins.
The best part? You absolutely do not need to be an artist to make these.
Start with colors you already have in your house.
Before I ever thought about what I was going to paint on the pumpkins, I picked my colors.
Rather than starting with traditional fall colors, look around your own house. What colors are already there?
For me, that’s blue, green and white. They’re colors I use year-round, so instead of my fall decorations feeling like something completely separate that arrived for two months, these pumpkins blend right into the rooms they’re in.
I used Folk Art Sky Mist, French Blue, Classic Green, and Vintage White for mine. I like the matte finish because it works especially well on the papier-mâché and gives them more of a hand-painted look.
For the smaller pumpkins, I kept things incredibly easy: a couple coats of paint in different shades of blue and green, then gold on the stems. Mixing those solid pumpkins in with the patterned ones keeps the whole thing from getting too busy.
TIP: Don’t worry about every pumpkin being exactly the same shade. A little variation actually makes the group look better together.


How to Paint the Floral Pumpkins
This is where I need you to forget everything you think a hydrangea is supposed to look like. You’re not painting a botanical illustration. You’re basically painting a bunch of wonky little hearts.
Seriously.
Start with one loose curved line for your stem. At the top, add three or four heart-like shapes. Then add more around those. And more around those. That’s your hydrangea.
The shapes don’t need to match. Your lines don’t need to be perfectly smooth. Some flowers can be large, some small, some can disappear around the curve of the pumpkin. In fact, the less you try to make everything identical, the better it looks.
For mine, I worked my way around the pumpkin adding flowers, stems, little buds and leaves wherever I thought they were needed. I wasn’t working from a precise pattern.
Once I had the basic floral design down, I went back and added the lighter color inside some of the petals to give the flowers a little more dimension.
And if you make a flower you hate? Paint over it. It’s a pumpkin. We’re not restoring the Sistine Chapel.
Don’t forget the gold stems. This might be my favorite little finishing touch. I painted the stems gold, which immediately made the papier-mâché pumpkins feel a little more finished and tied all of the different colors together.
You could absolutely leave the stems natural, but if you’re using several different shades of pumpkins like I did, repeating the same metallic stem on each one makes the whole collection feel intentional.


Mix the Painted Ones With Simple Pumpkins
You also don’t need to hand-paint hydrangeas on twelve pumpkins.
Please don’t do that to yourself.
I painted several of my smaller pumpkins solid blue and green and scattered those among the larger patterned ones. You get the impact of a whole coordinated collection without having to spend an entire weekend painting tiny flowers.
It’s also an easy way to carry your colors around the house. A few can go on a table, a couple on a bookshelf, another by the bar, and the larger painted pumpkins can be the statement pieces.
Make Them Yours
That’s really the point of this project.
Fall decorating doesn’t have to mean buying an entirely different color palette for your house every September. Start with the colors you already love and make fall fit your home.
If your house is blue and white, paint blue and white pumpkins. If it’s mostly neutrals, try cream, taupe and chocolate brown. If you’re a pink person, there is absolutely no rule saying you can’t have pink pumpkins.
And please don’t wait until you think you’re artistic enough to try something like this.
Mine have visible brushstrokes. The flowers aren’t identical. The lines aren’t perfect. That’s why they look hand-painted. And frankly, that’s the charm.


Products we used to make this project:


We’d love to hear your thoughts if you try this project!
Tag us @SouthernHospitalityCo if you make them!
Share this post:
Click this link to visit our shop! Follow us on social media below!
Southern Hospitality Company